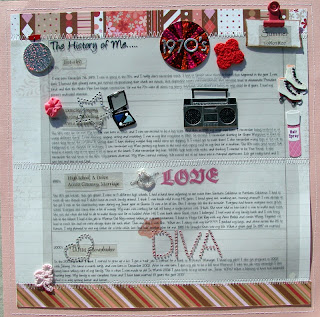
What a great class!!! Wow!!! I am really meeting some great ladies!! We had some newbies today!!! Totally great to meet them and add them to our class! Aweso{me} job everyone!!! Here are the instructions from todays class!! Click on picture to make it bigger if you want to see all the details!
Take a look at me & my day
2 Attach overlay on top of bazzil flower
3 Attach with staples ribbon to bottom left hand corner overlaying over lay
4 Ink with chestnut roan ink around the block 10x4 paper the adhere to layout (make sure it is under overlay)
5 Attach H/S playing card on an angle
6 Ink title before attaching with pop dots on letter "M" t
ie some ribbon around one of the legs
7 Add picture to layout rough up edges if you like
8 Add H/S bling randomly on layout
9 Stamp date
10 Print daily schedule on 81/2 x11 transparency, cut into strips, attach using adhesive and add staples to make it look like that is what is hold your transparency strips on your layout. You don't have to do every single strip just here and there.
11 With Crystal Laquer go over over title & look at me on transparency
12 Add stickles for ... at end of title and around outer edge of Bazzil flower
This is my style...
1 Using a pencil create 3 swirls freehand in three different sizes. Keep in mind to leave space for your picture and title. Try to put the swirls kinda in the middle of the layout
2 Attach brads on top of swirls. I used arpox. 200 brads
3 Title was handwritten
a- use pencil to write out title "This is My Style"
b- go over it with black American Crafts Marker Med Point
c- Thicken different parts of the letters w/ A/C pen
d- Add more shaddoes with black colored pencil
e- Go over entire title with clear stickles
4 Picture (a) attach a 4x10 b&w picture to right hand side of layout (b) w/ second photo I printed a 4x10 colored copy then cut out my body inked the edges in black ink & attached over b&w photo with pop dots
5 Print journaling cut into strips. Journaling should be about what kind of style you have when it comes to clothing, jewelry, purses, shoes ect…
My words....
· Cut Sassafrass- Crème Brulee/dreamstreet papers- daydreamers/Hopes 2-1x12” strips & 1- 1x6” Attach 1x12” strips to Bazzil cardstock one on top & one on bottom keep the 1x6” strip for later
· Cut Sassafrass- Delectables/dreamstreet papers Day Dreamers/Musings
1 solid circle * 7” in diameter. Attach to middle of layout
2 hollow circles 1- *71/2” & 1- *9” Attach making them overlap one another
*these are just my dimensions you can make them any size you want
*I used the Curvy Circle Cutter to cut my circles the perfect shape!!
· ew on your solid circle- make a starburst pattern
· Attach picture(s)
· Ink library pocket & cards, now you will use the 1/2x6”strip of Sassafrass Crème Brulee/dreamstreet papers-daydreamers/Hope- tear these into 2 strips attach
staples to strips before attaching to the front of the library pocket front.
· For the date, I used a piece of library card, inked it up with chestnut roan ink & attached to the front of the library pocket
·
Add H/S bling on pocket & to the corners of layout
Add buttons randomly on top of circles1 Cut Heidi Grace Designs mushroom/stripe pp 2- 1x11” strips
2 Cut Dreamstreet Papers- Unique Boutique altered journal 10x11”
3 Align all 3 pieces on 12x12 Bazzil Blossom cardstock. Adhere so they are centered in the middle of the Bazzil
4 Attach transparency on top of Dreamstreet Papers- Unique Boutique altered journal. You will have to cut the transparency down to fit on layout
5 Sew around the perimeter on Bazzil Blossom a straight stitch
Sew a zigzag connecting Heidi Grace Designs mushroom/stripe pp w/ transparency on top & bottom. Also sew a zigzag stitch in the middle of the transparency. (Make sure to stay on the transparency and not to run onto the out edges of the Bazzil cardstock)
6 Attach embellishments
Remember to email your journaling to scrapfunattic@cox.net so we can print your 12x12 transparencies!!!!


1 comments:
Amiable brief and this post helped me alot in my college assignement. Thanks you on your information.
Post a Comment